Minterans,
Along with today’s launch of the Mintera App on Testnet, we’ve prepared everything to make sure early adopters that participated in the MNTE presale can try out the Mintera App and Green Mining Yield (GMY) product on the Testnet.
As announced before, the Mintera App is first released on Testnet so that people can try out the different functionalities and become familiar with how the application works.
What you need
To use the Mintera App on Testnet, you need:
- A Metamask wallet
- Testnet MNTE on the Sepolia network
- Testnet ETH on the Sepolia network to cover transaction fees
To facilitate the process, we have already sent both testnet MNTE and testnet ETH to every wallet that participated in the MNTE presale.
If you have not participated in the MNTE presale but want to try out the Mintera App, please send us an email at contact@mintera.co with your wallet address and we will send you some Testnet assets.
Now, let’s go over the steps you need to take to use the Testnet.
Enabling Sepolia on Metamask: step-by-step tutorial
In this tutorial we assume that you already have Metamask installed on your computer and an Ethereum wallet. If you don’t, please go to the official website and install Metamask.
Enable the Sepolia Network in Metamask.
1. Open Metamask. Make sure you are on the wallet you invested in the presale with.
2. Click on the top right circle icon, find where it says “Settings”, click on it, then click on “Advanced”.
3. Scroll down until “Show Test Network” and toggle On.
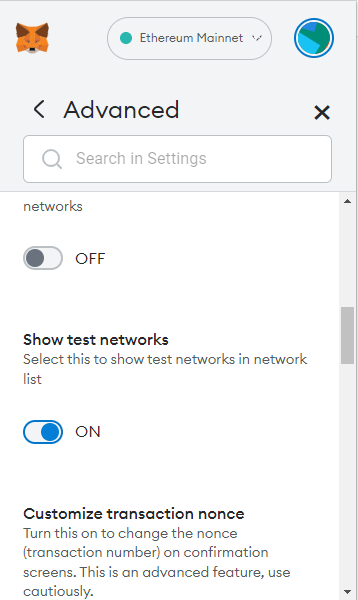
You have added the Test Networks to your Metamask. You can close the settings window.
Switch networks on your Metamask wallet.
1. Open your Metamask app. Click on the button at the top of the app where it mentions your current network i.e. Ethereum Mainnet.
2. Select “Sepolia test network” in the dropdown list
3. And that’s it, you are now connected to Sepolia. If you need to switch back to Ethereum Mainnet, just do the process again but select Ethereum Mainnet in the dropdown list.
Now you should see your testnet ETH balance but not your testnet MNTE balance. This is because you have to import the token first.
Import the Testnet tokens
1. Check that you are connected to the right wallet and to the Sepolia Network at the top of the Metamask window.
2. Click on the “Assets” tab at the bottom of the window, then click “Import tokens”.
3. Under “Token contract address”, copy and paste the address: 0xaa34e92Fe3c0E8dcdf2d182D832B2156B073c6D7 – the other fields should appear automatically.
4. Click “Add custom token” and then click “Import token”. Now you should see your testnet MNTE balance in your wallet.
5. Repeat steps 2 to 4 with the address 0x6EF7469D971C9e4d2be0d6e6AB8971550631f03d – this will add testnet USDT which is needed to see your testnet GMY rewards in your wallet.
Connect to the Mintera App
1. Go to app.mintera.co, click on “Connect wallet”, select Metamask, select your account and click connect.
2. Now you should see your MNTE balance in the app.
3. You can now go to the GMY tab and stake MNTE.
You now have everything you need to try out the Mintera App. You should have enough testnet ETH to cover basic transaction fees. If you need more, you can use faucets such as https://sepolia-faucet.pk910.de/. In case you need any help you are welcome to join the Mintera Discord server.
Happy testing!